I spend quite a lot of time each week on digitizing or tinkering with the website, but I also like to work on other crafts and projects. This page showcases mostly things I've been working on, though I do sometimes feature items made by my sisters. Most are embroidery-related, but some show other crafts and activities as well. Many of the items, though not all, are gift items for friends and siblings, mainly for Christmas, the biggest gift-giving time of the year in my family.
If any of these project ideas interest you, please let me know and I'll post some detailed instructions.
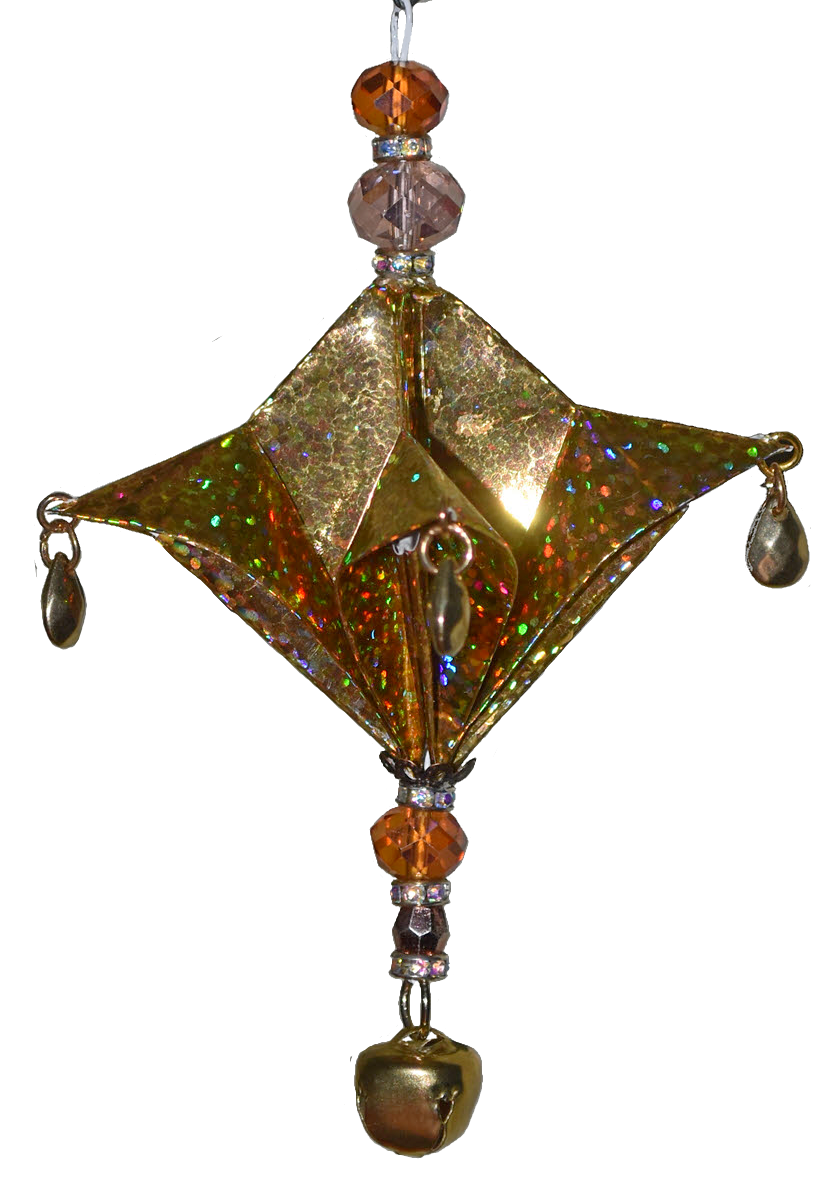
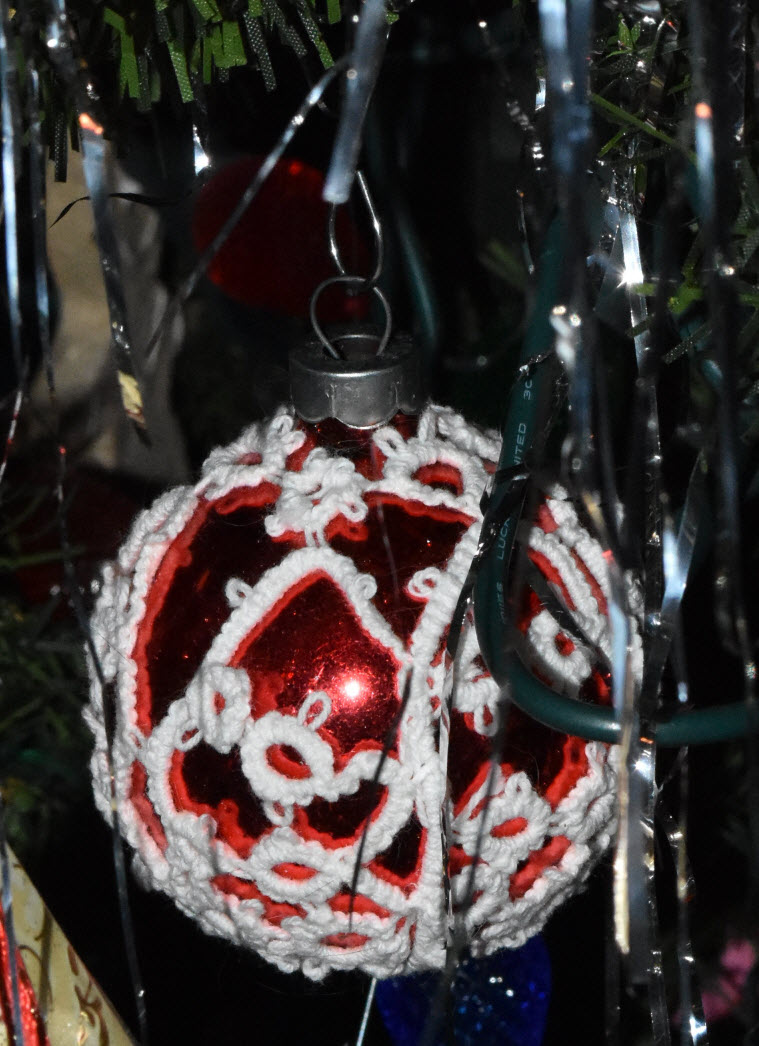
My Sisters are So Talented!
Posted 2019 Dec 20
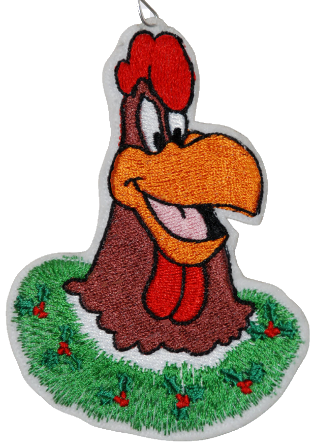
I'm fortunate to have several talented crafters in the family, and my sisters sent me several gorgeous handmade Christmas ornaments. I look forward each year to receiving some of their beautiful work.
Luxurious Plush Specialty Stocking
Posted 2019 Dec 13
I made Ruth's Riders stocking out of a lovely, oh-so-velvety upholstery plush: see for yourself how luxurious it is.

And if you're interested in learning my technique, which results in a fully attached lining, click here to find the PDF instructions, along with the stocking template I use most often.
Mini Santa Doll for the Tree
Posted 2019 Dec 06
I finished up my friend's 2019 Ornament of the Month series with this Mini Santa doll, a smaller version of a vintage doll design of my own, from back when I was an undergrad.
He's about 9.5" tall, and can perch on the tree, or lounge in a wicker sleigh that I found -- it's just his size.

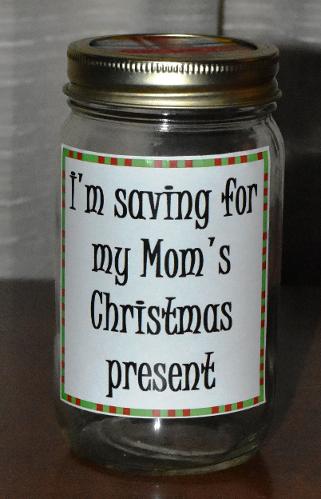
Humorous Mason Jar Bank
Posted 2019 Nov 29
A customized savings jar makes a terrific stocking stuffer: it's inexpensive if you use a recycled jar, and it adds a bit of humor to the gift opening festivities.
I thought it was just the thing for my friend's twenty-something son's Christmas stocking! Check it out!
Evening in Paris Mini Stocking
Posted 2019 Nov 22
Because we so often received Evening in Paris perfumeat Christmas when I was a girl, its iconography will always be in part a Christmas memory for me.
Capturing that memory in one of my Mini Stocking designs has been in my mind for some time now, and here, finally, is the result.
Check out the details in this PDF.

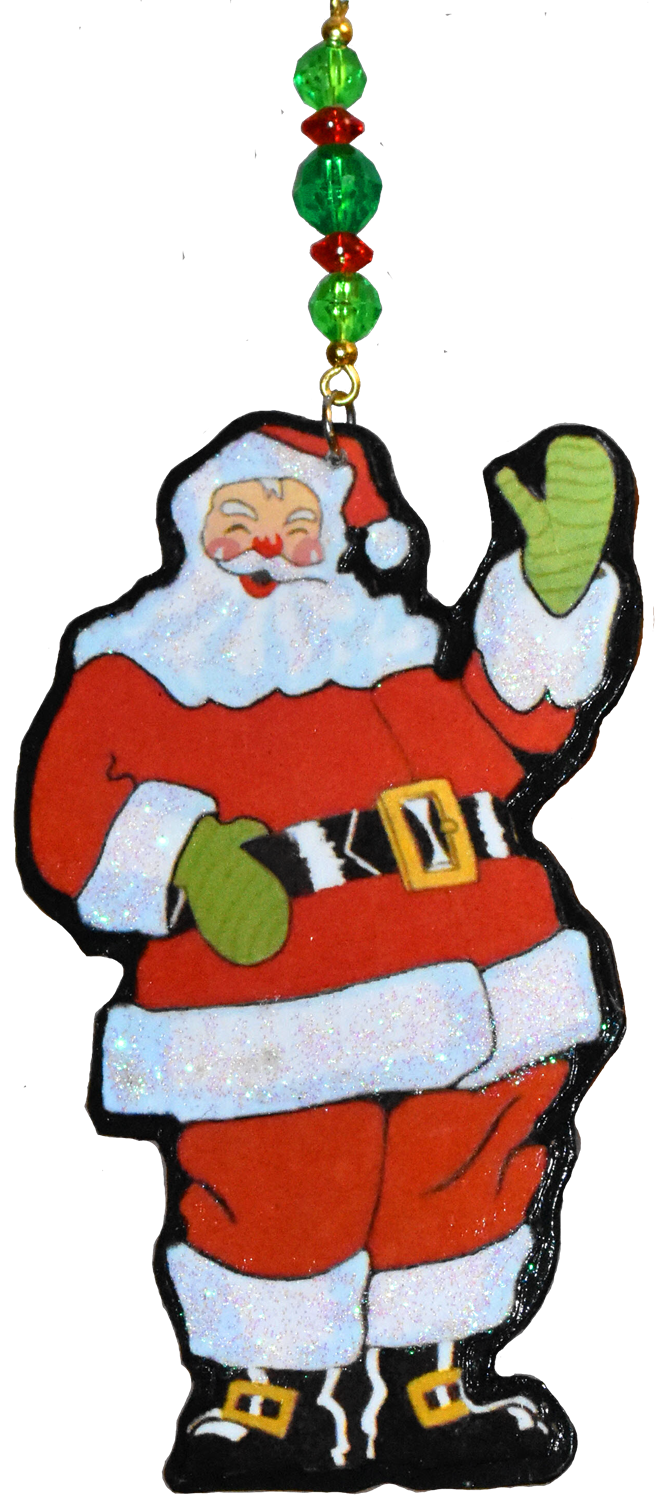
My Christmas Includes Nostalgia
Posted 2019 Nov 15
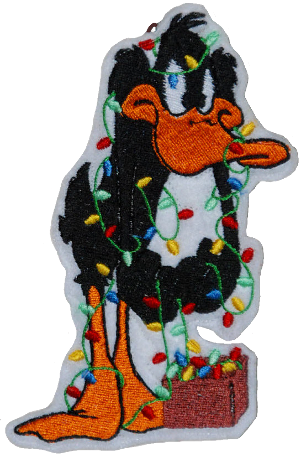
It's another non-embroidered project this week: a Christmas ornament inspired by a piece of vintage yard art that I recall fondly from my youth.
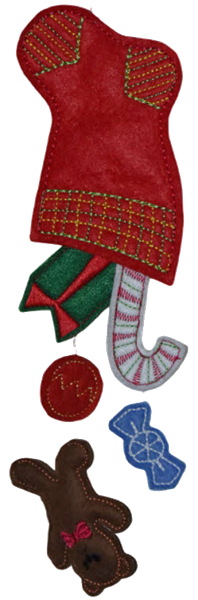
The Teeniest of Christmas Stockings
Posted 2019 Nov 08
These stockings are just under an inch and a half tall -- they're shown on a 1" grid in the photo. I'm always looking for tiny embellishment to use in making ornaments and other Christmas crafts. How fun that this project can answer both needs!
They are so darned cute that I'm going to make a bunch more for crafting. They're too small to actually hold anything much, but you sure could roll up a tiny note and tuck it inside. To see more about how to make them, check out this PDF.
And if you'd like to make some too, download the design here.

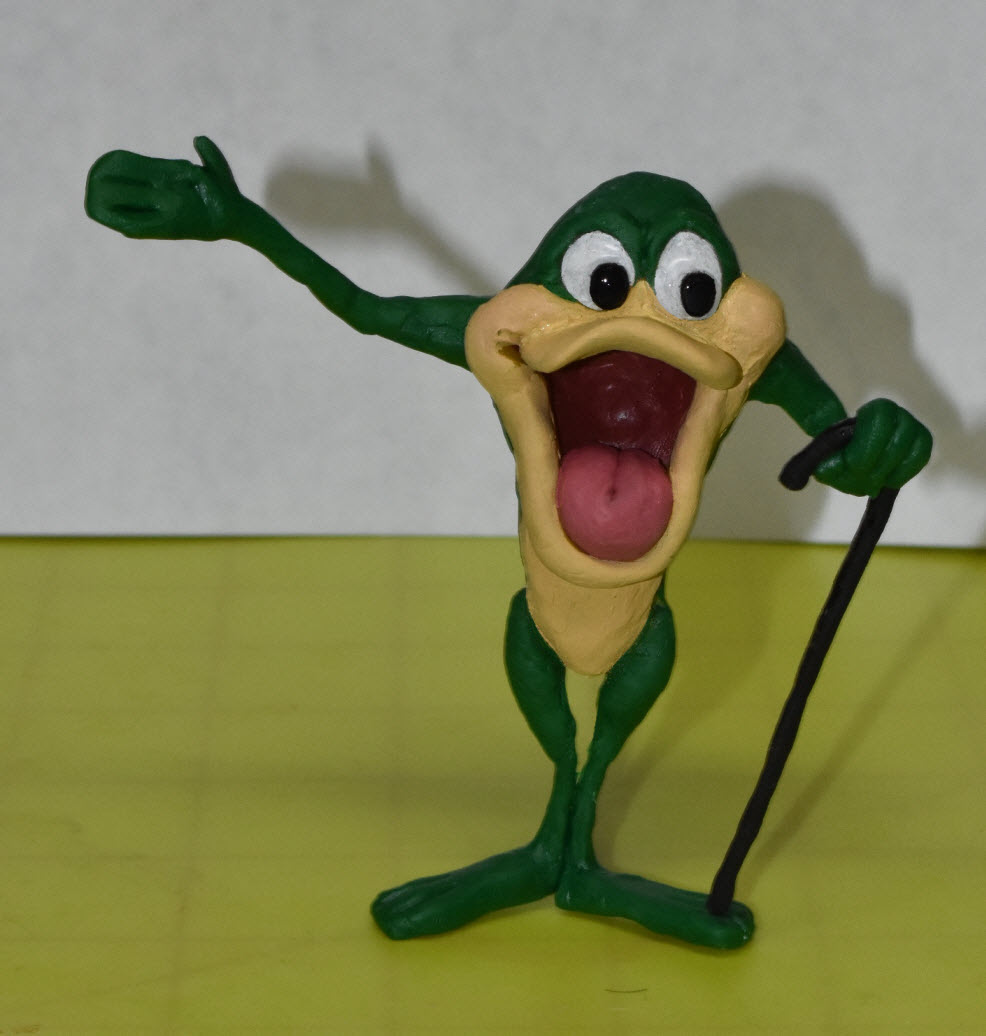
A Polymer Clay Character Ornament
Posted 2019 Nov 1
I'm not terribly skilled with polymer clay, but I am a big Looney Tunes fan, and this year I decided to make this Michigan J Frog for hubby's Christmas sock.
Want to see how I did it? Find the PDF here.
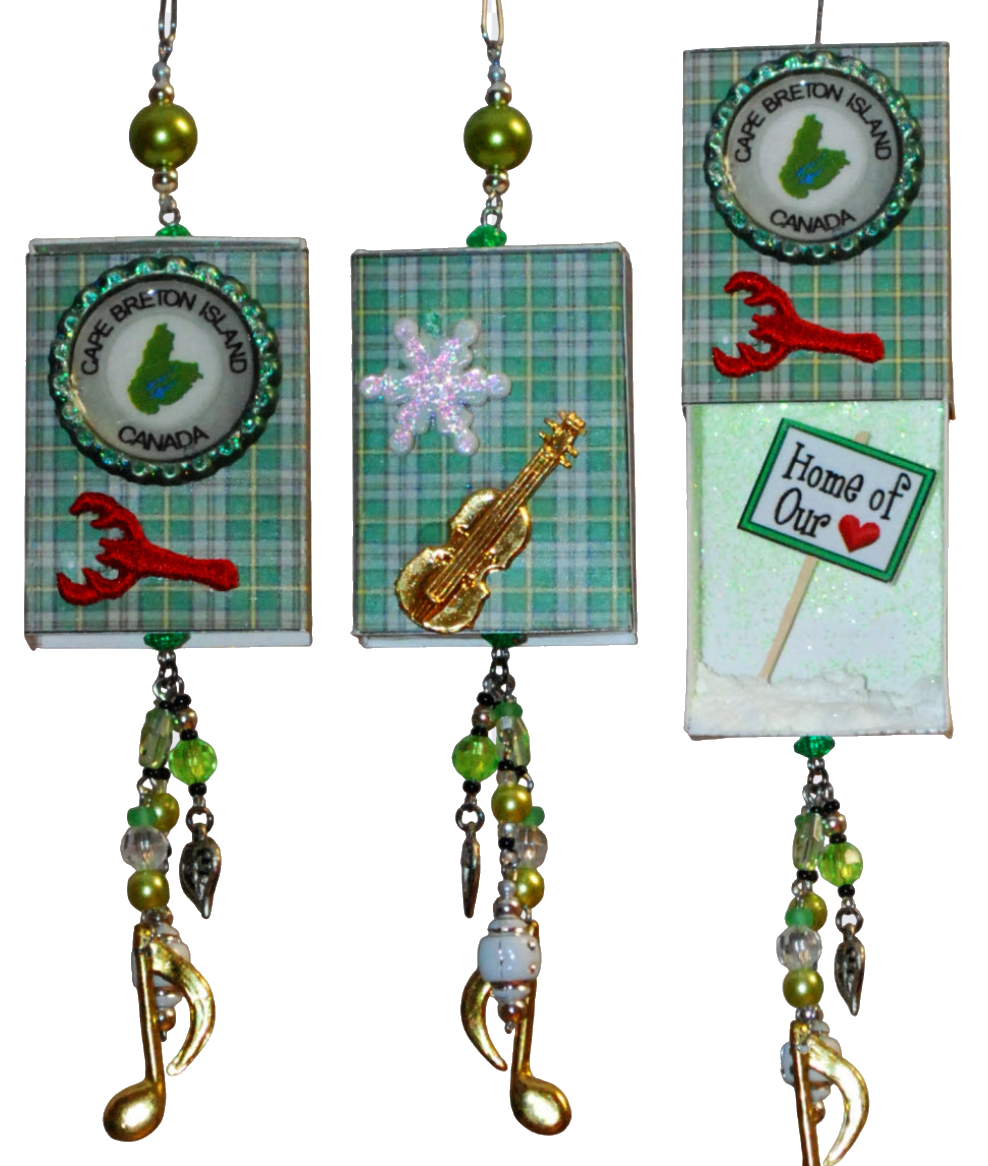
Lobster Embellishments for Crafting & Scrapbooking
Posted 2019 Oct 25
I use tiny embellishments on some of my projects, but often I can't find exactly what I want in the stores, and I have to make it myself.
Lately I've been using the embroidery machine to make adorable tiny lobsters.
Trekkie Badge Applique on a Jacket
Posted 2019 Oct 18
My sister-in-law is crazy for all things purple; she's also a Star Trek fan, and this jacket is just the right style for the addition of a Star Trek badge to the lapel.
To read more about this project, and see the badged jacket, click here for the PDF.

Another Christmas Stocking, with Instructions
Posted 2019 Oct 11
I love Christmas stockings -- making them, using them for holiday decor, and gifting them. A beautiful new Christmas stocking is one of my favourite gifts for a new baby.
To see Baby Callie's new stocking, click here for the PDF.

And if you're interested in learning my technique, which results in a fully attached lining, click here to find the PDF instructions, along with the stocking template I use most often.
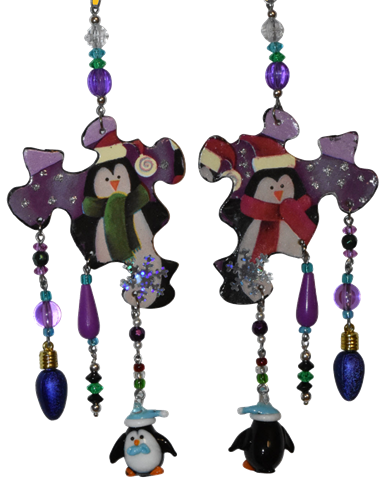
Altered Puzzle Ornaments
Posted 2019 Oct 04
From time to time I post non-embroidery projects like these fun ornaments made from altered pieces salvaged from a discarded child's puzzle, plus some beads from my stash.
I've made a couple dozen of these as gifts and for my own tree.
Hogwarts Christmas Stocking Completed
Posted 2019 Sep 27
My very first project when I finally got the embroidery machine back up and running was to complete the Hogwarts stocking I began back in February. I was waiting for baby Lily to arrive. Now that she's here, you can see the finished stocking!
Vintage Christmas Stockings Recreated
Posted 2019 Sep 20
As a surprise for Hubby, I recreated his childhood Christmas stocking, and those of his siblings, which hadn't been seen by any of them for more than 40 years. I had loads of fun replicating all four originals, which were lovingly made by their mom so long ago.
Click this link to find a PDF that tells the story.

And here's the link to the details of how I make my fully lined stockings, along with the stocking template I use most often.
Wool & Walnut Shell Pincushions
Posted 2019 Jul 12
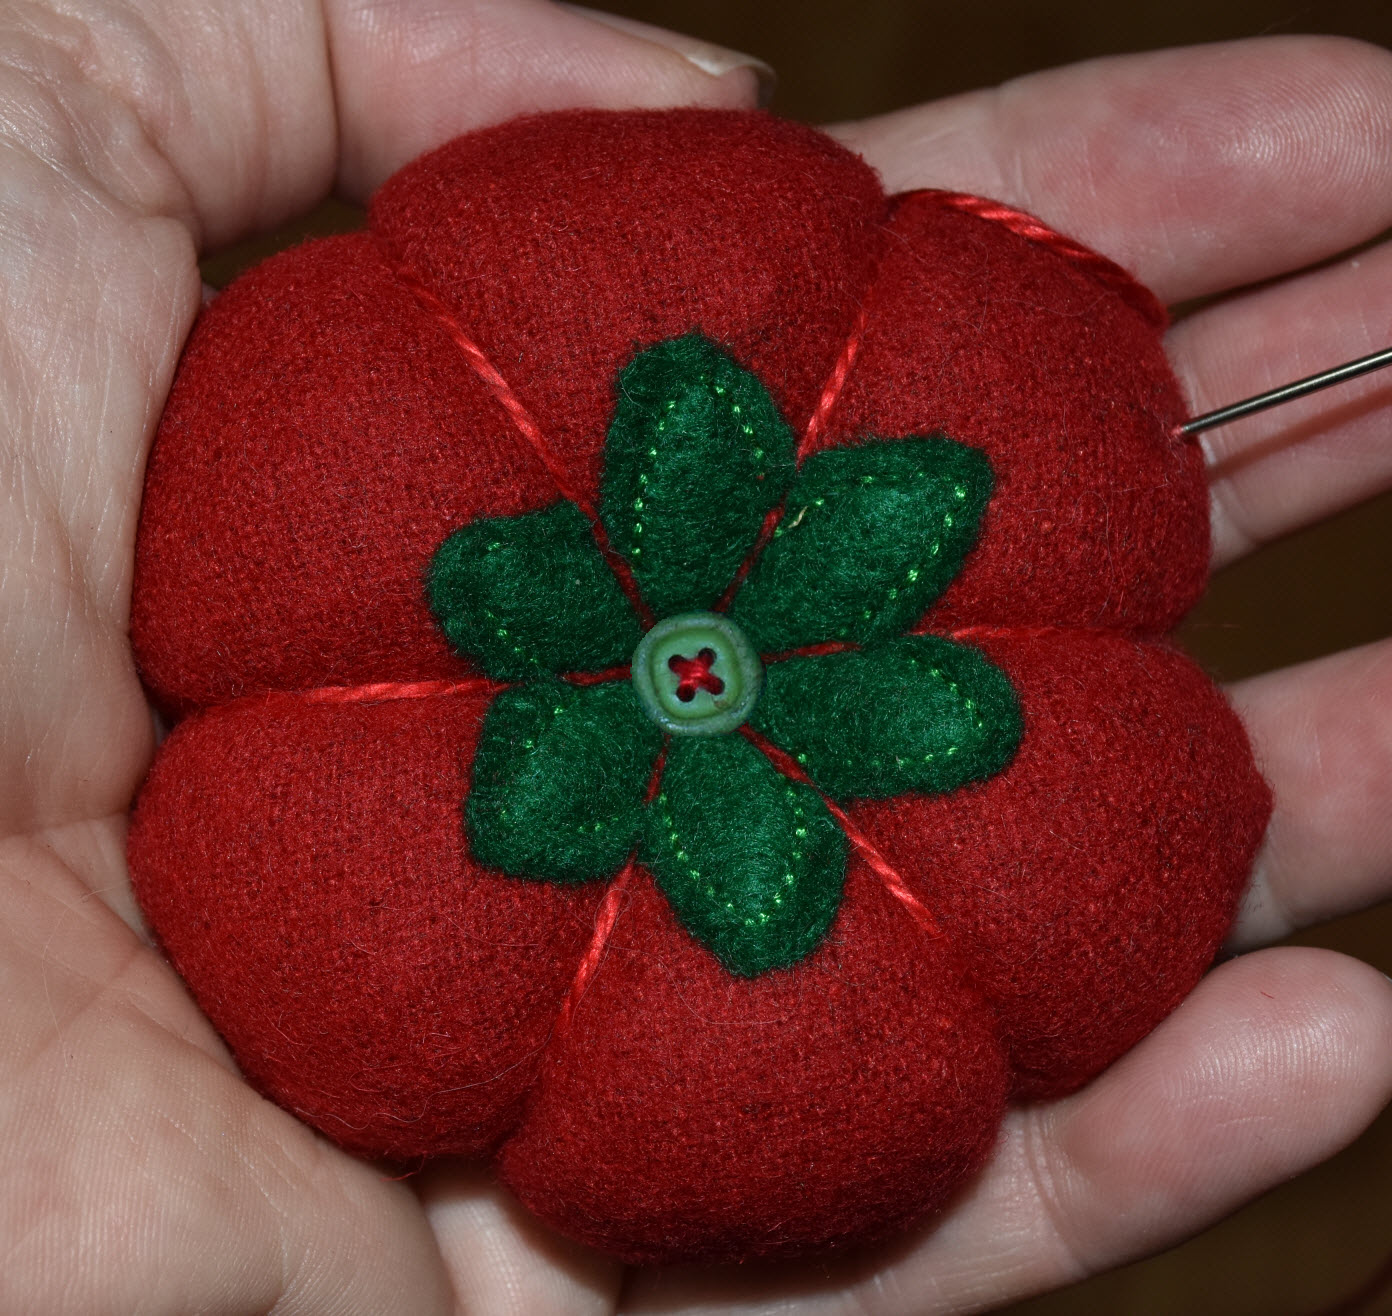
Lately I've been making my own simple pincushions out of wool filled with ground walnut shells. I've made several and now have one at every sewing machine, and I love them! The wool wicks away moisture to help retard rusting, the natural lanolin helps lubricate the pins, and the ground walnut shells -- commonly used for sandblasting -- keep the pins sharp. They are the best pincushions I've ever had: not fancy, but really functional.
You can read more about this project in this PDF.
If you'd like to make some of these for yourself, you can find the pattern free at this link .
You can also download the PDF instructions if you decide you need them.
No More Cap Button Irritation
Posted 2019 Jul 05
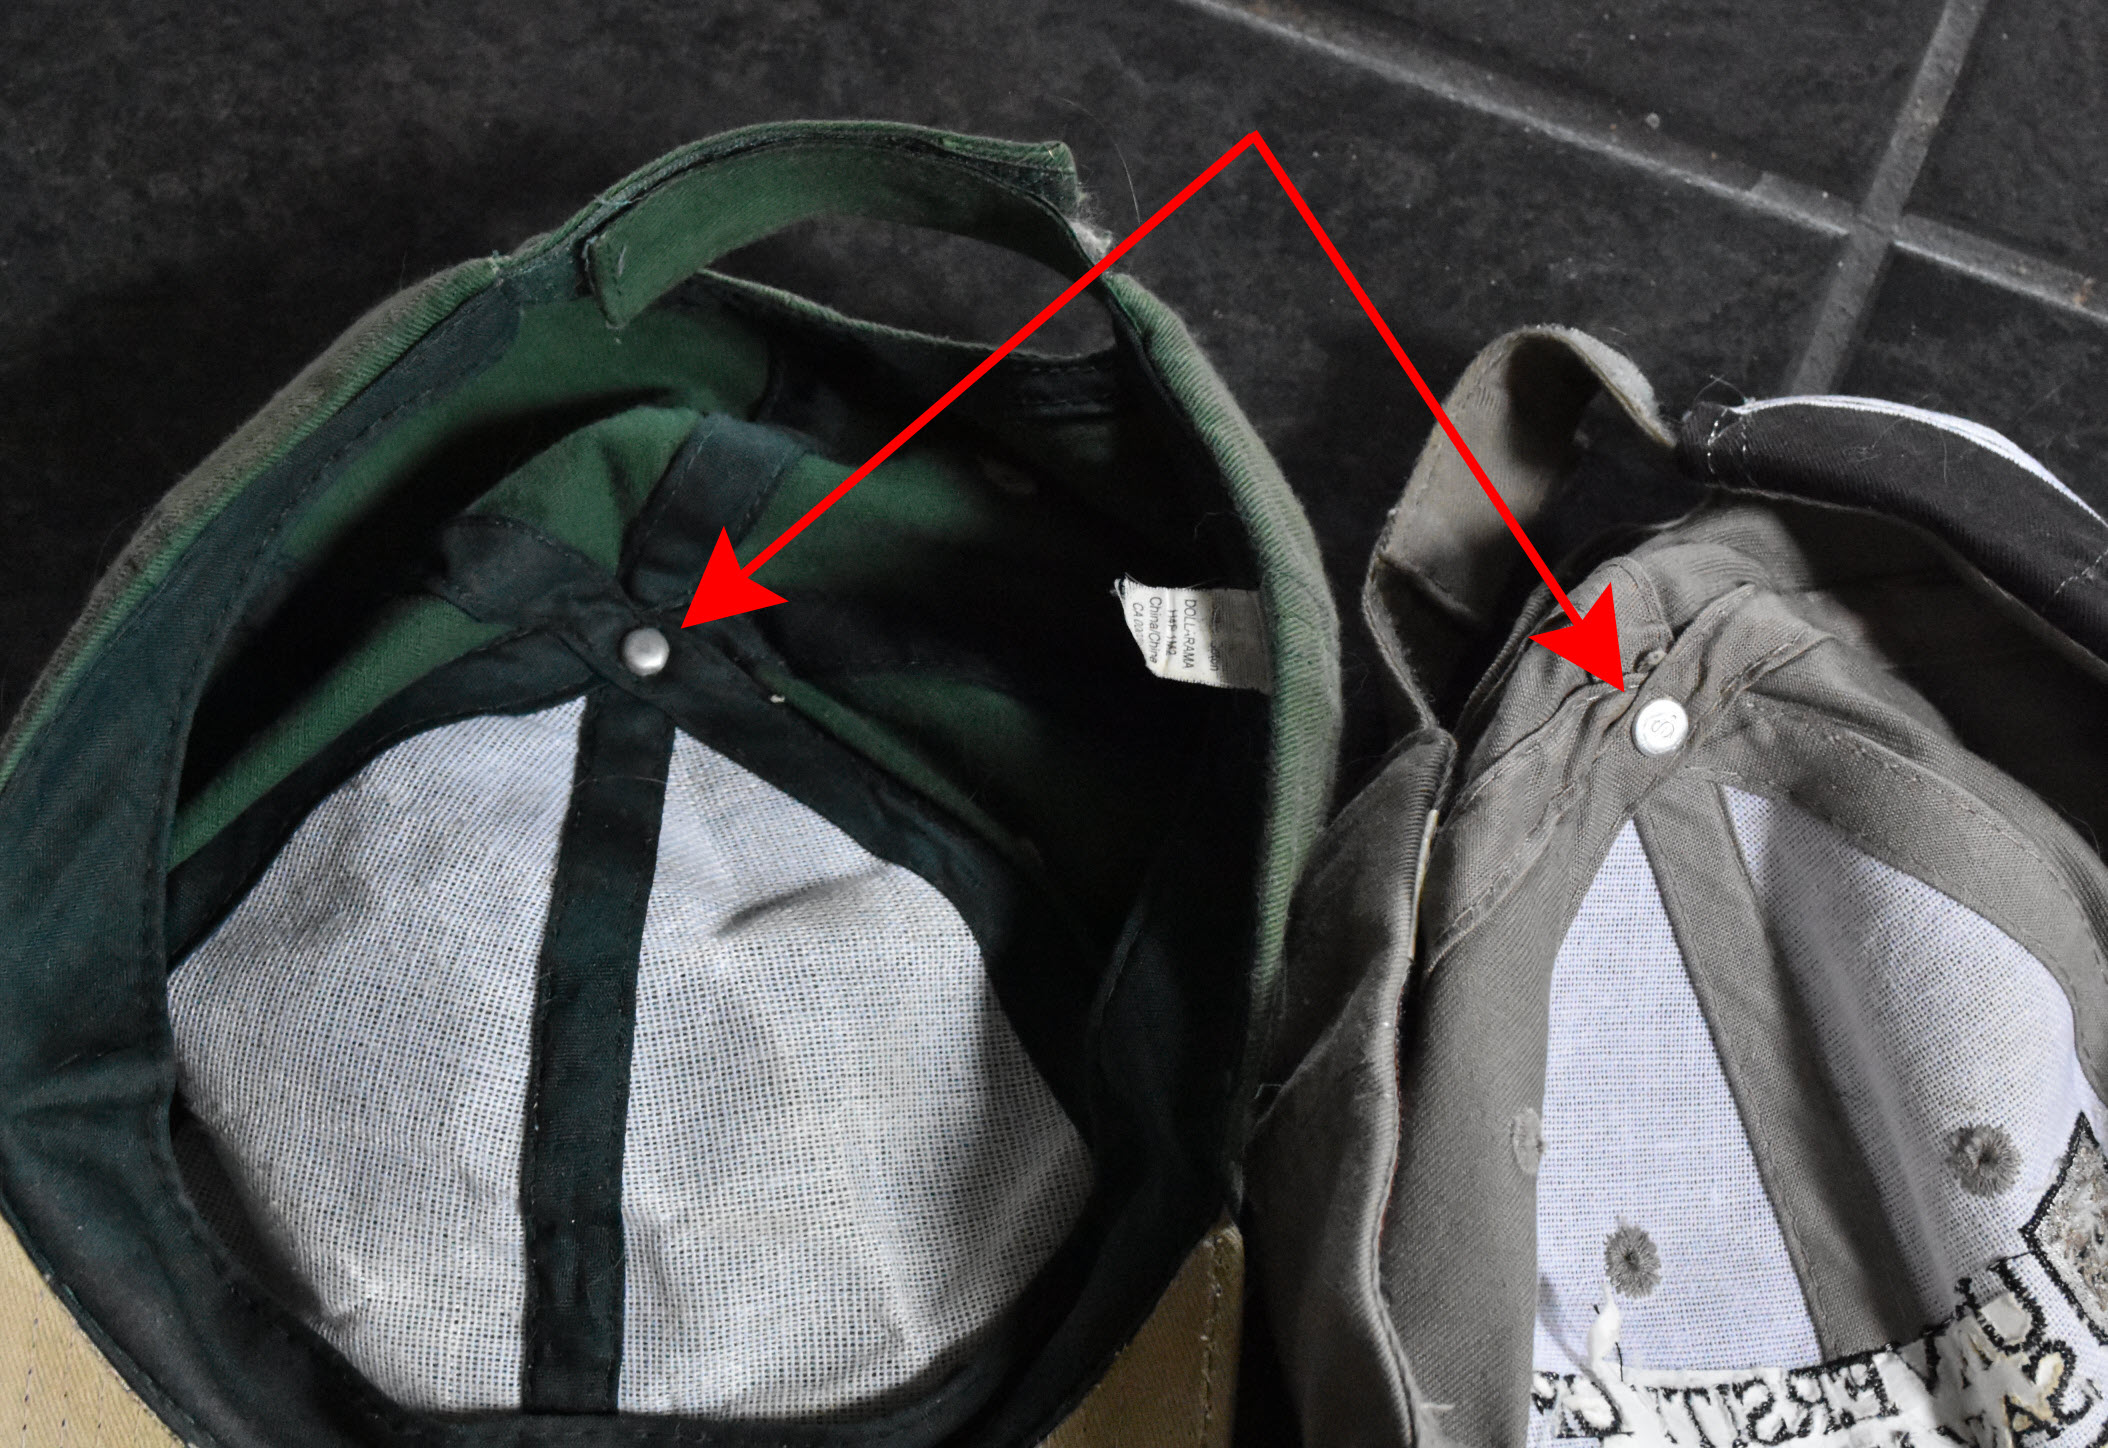
The rivet that attaches a button to the top of a baseball cap leaves a metal protrusion on the inside of the cap that can cause irritation to a tender scalp. But I figured out a way to pad the uncomfortable metal point -- and it barely shows on the outside of the cap!
Click here to see a PDF showing how I did it.
A Trekkie Stocking for John
Posted 2019 Jun 28
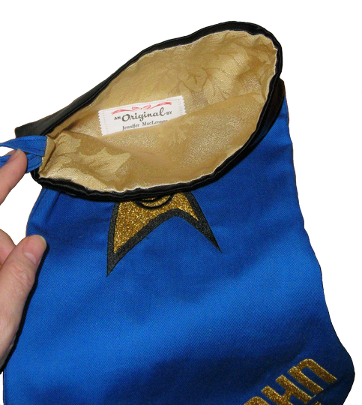
A few years back, my sister asked me to make a special Christmas stocking for her Trekkie friend John, and since I love making stockings, I was happy to oblige. The finished stocking is just gorgeous!
Reusable Nylon Grocery Bags
Posted 2019 Jun 21
I love reusable shopping bags, and have made a variety of totes and cloth bags over the past few years. But tote bags can be bulky and cumbersome to carry, and it's easy to forget to bring them into the store with you.
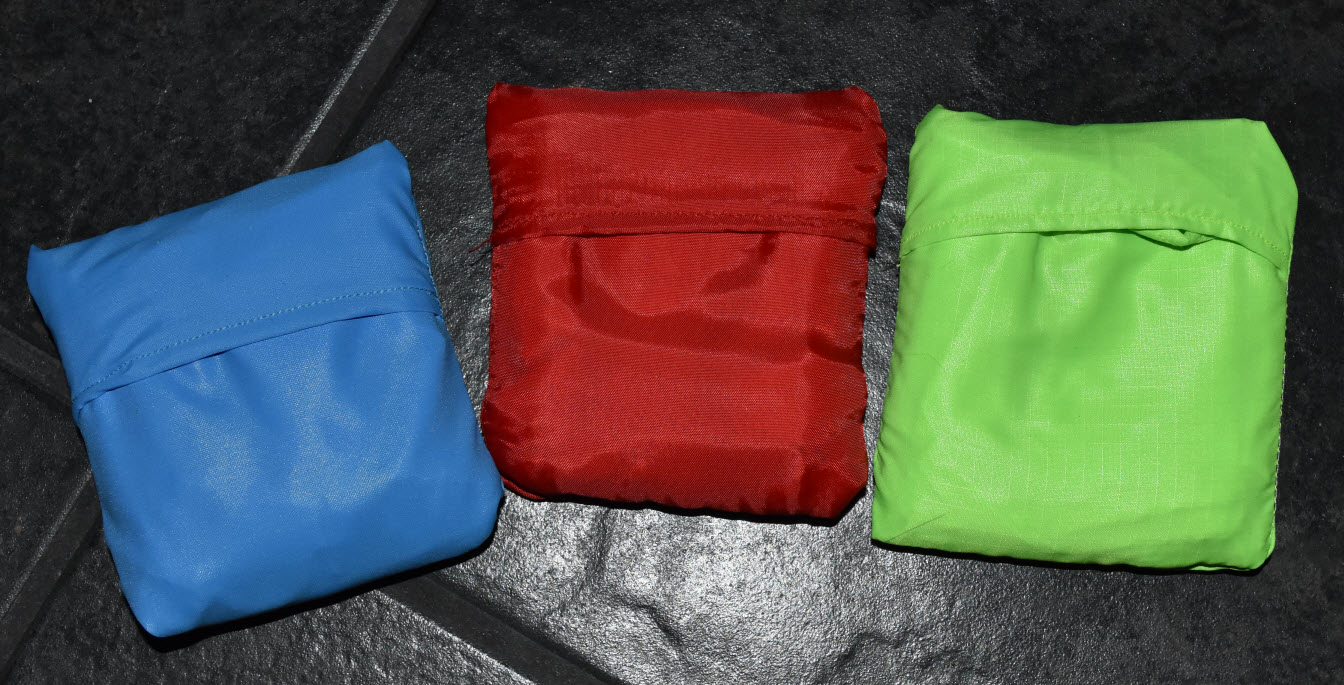
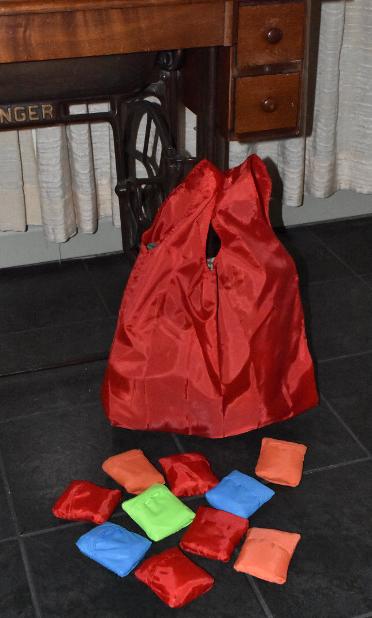
This nifty nylon version tucks into its own integrated pouch, so it's easy to carry in a purse or pocket. I recently grabbed some ripstop nylon from the thrift store, and spent a couple of days sewing these bags.
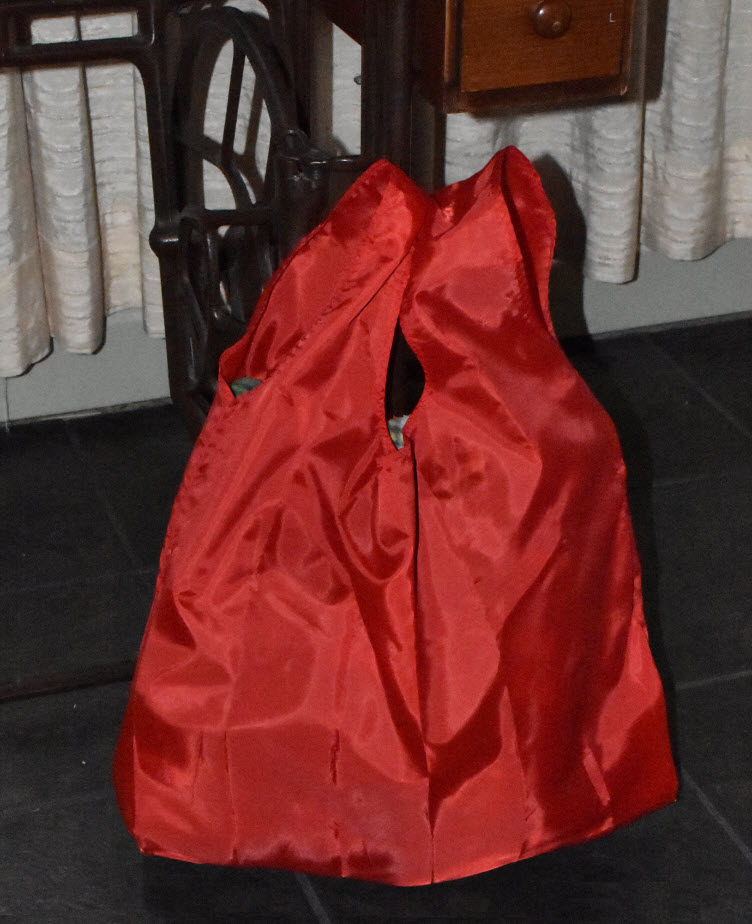
They're roomier than the plastic kind, and they're also stronger, so they'll last for a long time. Plus, they're washable, colorful, and eco-friendly.
My version is fairly large -- I cut the fabric to 19" x 45", then used a plastic store bag as a guide for cutting the handles. I finished the edges using the serger, and stitched the bottom closed on the sewing machine.
The image below is just a guide; it's not exactly to scale, but it will give you an idea of the general shape.
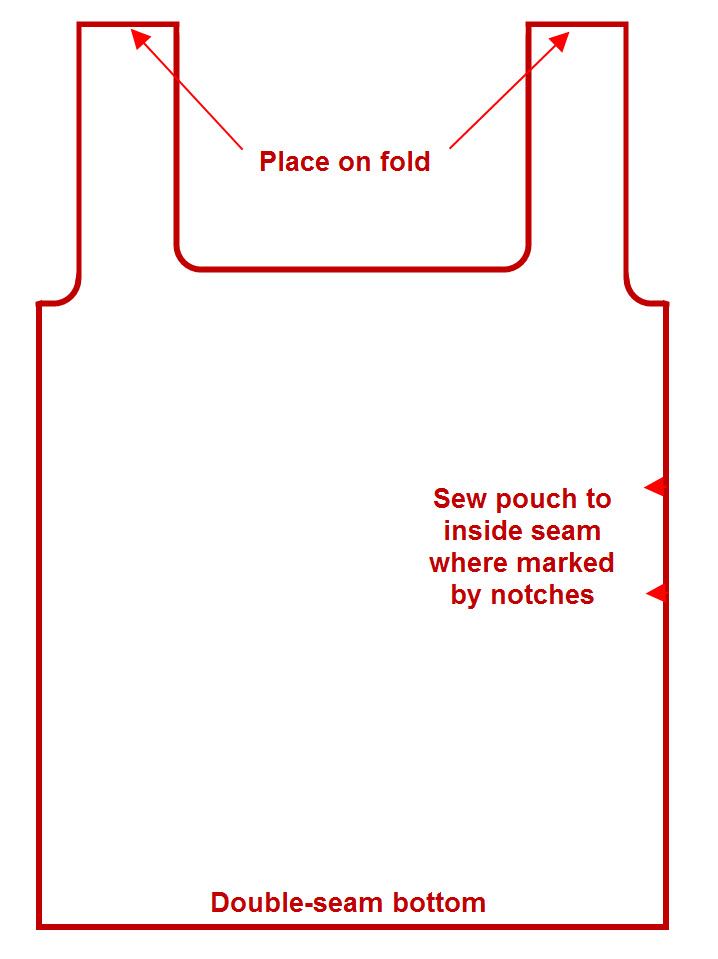
To make the integrated pouch, I cut two pieces of fabric, one approximately 4x4" and the other approximately 4x6" wide. I serged all around the edges, then hemmed one edge of each piece. I folded a tuck flap in the larger piece and seamed the two pieces together along the sides. Then I lined up the bottom of the pouch with the side seam approximately at the position of the notches, and stitched it to the inside of the bag, where it's out of the way when the bag is in use.
To fold up the bag into the pouch, fold it in three lengthwise, then roll up the bag body to a size that will fit the pouch, then flip the pouch over to contain the folded bag. Hubby has declared these a hit -- he took several when he picked up groceries the other day and was very impressed with how much they hold and how strong they are, so it will be easy to convince him to take them along on future trips to the store.
In-the-Hoop Rag Doll
Posted 2019 Jun 7-14
My friend recently informed me that as a kid she loved Raggedy Ann, so I decided to add a mini doll to her Ornament-of-the-Month collection.
Because the doll is intended to be a tree ornament, she's quite small; I added the thread spool to the photo to give a sense of scale.
I had already digitized the appropriate doll face, so I decided to see if I could stitch the entire doll body on the embroidery machine. She was stitched in the 4" embroidery hoop.
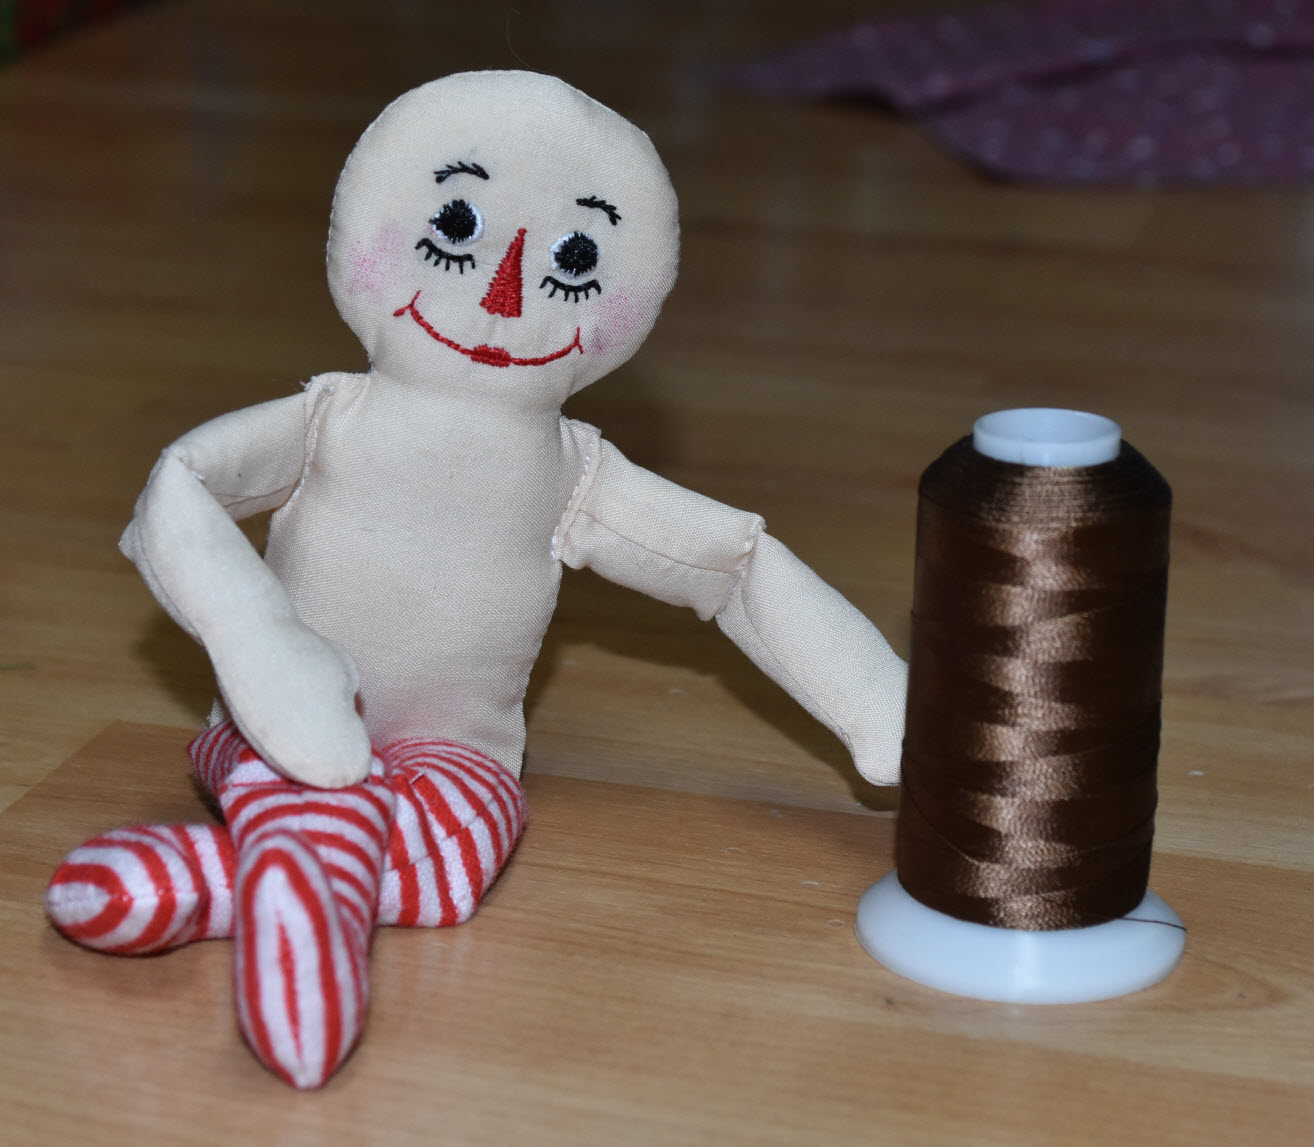
I used three hoopings to make her -- one for body and face, one for arms, and a third for the legs. I added rosy cheeks using a crayon, and plan to paint on the black boots with acrylic paint. Then I'll add yarn hair and dress her in a tiny Christmas print.
I'm planning to make a larger version for my friend's baby granddaughter, also stitched on the embroidery machine. Stay tuned for that one to appear in a later project update.
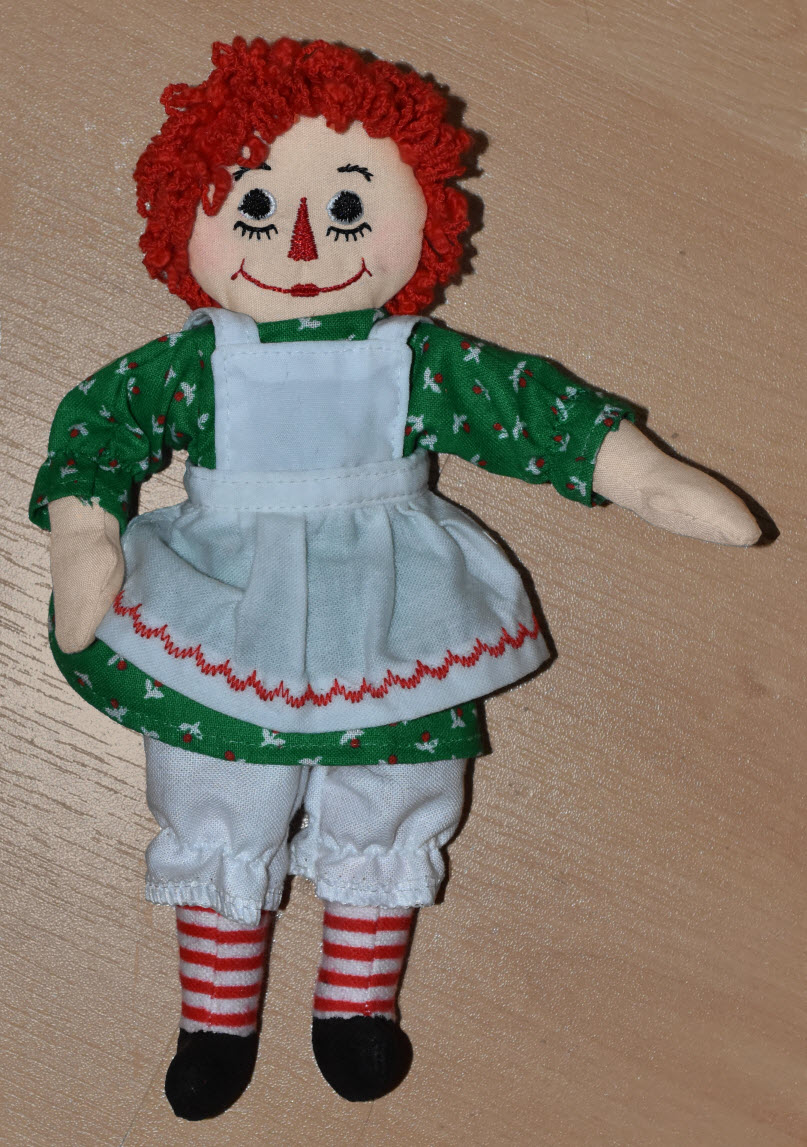
I thought I'd post an update about the little Raggedy Ann, since I have added hair and have clothed her since last week. She's looking pretty fine now.
I made her hair using nubbly yarn and something called a "Singercraft Guide" which allows you to wind yarn and stitch along it to make a looped trim. Then I hand-sewed the resulting trim to her head, framing her face and filling in the back.
I made a bibbed apron for her, but realize now on having looked at a vintage doll that the apron is actually a simpler construction than this one, so I may change the apron style if I make a subsequent doll. The red trim was stitched on my Model 500 Rocketeer, using cam #6.
I'm not sure you can make out the tiny print on the dress, but it's Christmas holly, in keeping with her status as a tree ornament.
She stands about 7 and 1/2" tall and will be able to perch on my friend's Christmas tree as a nostalgic ornament.
My friend is always intrigued to hear what I've been making in the craft room, and I sometimes bring a show and tell when we get together. On our last visit, forgetting for a second that the doll is intended for her, Hubby announced that I had made this mini Raggedy Ann. She expressed surprise that I hadn't brought the doll along for her to see, but fortunately she didn't see the look on my face when he made the remark, and I don't believe she suspected anything. I'm positive she'll be thrilled when I do present it to her as one of her ornament collection.
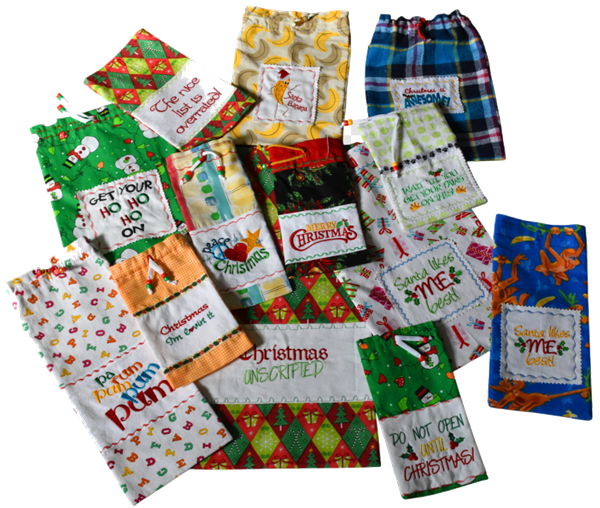
More Christmas Gift Bags
Posted 2019 May 31
I like to give my vintage sewing machines a workout with a few small projects just to keep them tuned up and sewing smoothly, and lately that means cloth gift bags. I'm hoping to build enough of a stockpile that the whole family can use them for all of our wrapping.
Step into the studio to see some of the most recent additions, and to learn more about how I make them.
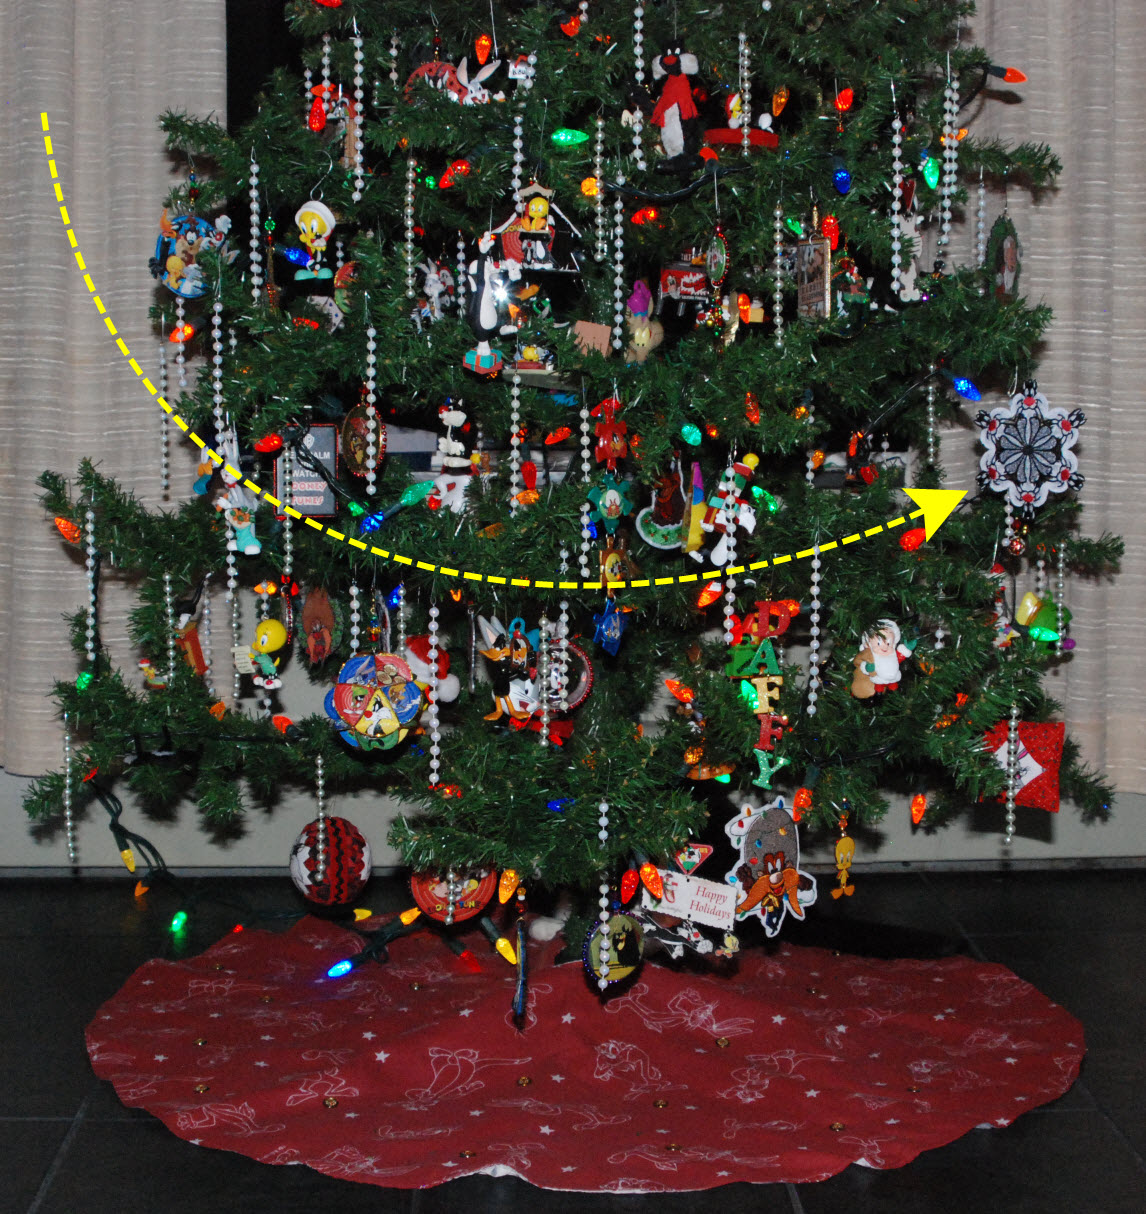
FSL (Lace) Cartoon Cat Snowflake
Posted 2019 May 24
This project combines four of my favorite things: a digitizing challenge, a freestanding lace project, a Christmas ornament, AND Looney Tunes! What on earth could it be?
Find out, and see the finished lace snowflake hanging on the tree.
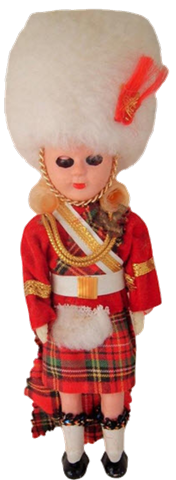
Vintage-Style Souvenir Doll
Posted 2019 May 17
My sister has a modest collection of these Scottish souvenir dolls, inspired by a trip to Scotland when she was a toddler.
But . . . she didn't have one dressed in the family tartan, in my view a serious oversight. So a few years back, I decided to create one for her.
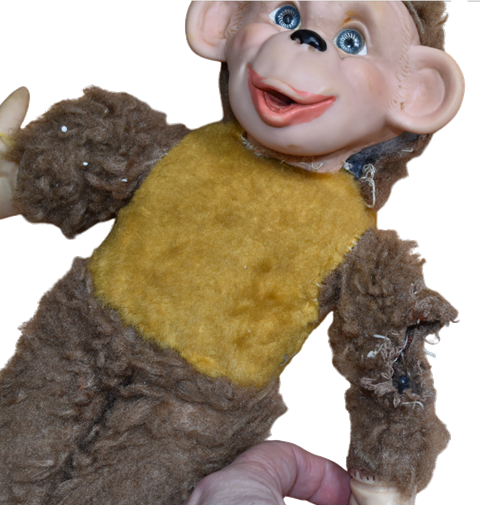
Zippy Gets a New Suit
Posted 2019 May 10
These stuffed monkeys with the vinyl hands and faces were very popular toys when I was a little kid, so I was delighted to find this little Zippy in the local thrift store for only a couple of dollars.
He was in pretty rough shape and rather dirty, so I knew when I rescued him that I'd need to remake him completely.
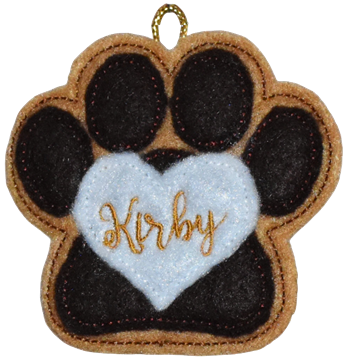
Personalized Felt Dog Paw Ornament
Posted 2019 May 03
My friend's beloved little dog is now 16 years old, but he's still a light of her life, so I've included a few in her Ornament of the Month collection to celebrate the bond they share.
To make the paw ornament, I chose felt in two shades of tan/brown, the main colors in Kirby's coat, and stitched the ornament on two layers of tear-away stabilizer (this one isn't stuffed). I went with white for the heart and gold for the name stitch-out, although on reflection I kind of wondered if I should have chosen a shade of pink for the heart, just to brighten the color a bit.
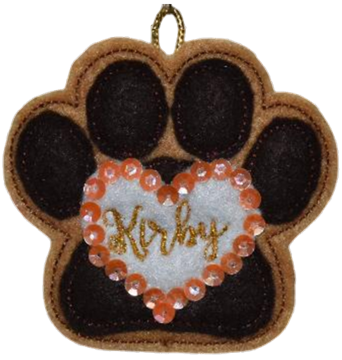
When I'd finished, I wasn't quite happy with the brown look, so I decided to add some sparkle. I chose peach sequins to outline the heart, and used a toothpick to add a tiny bit of gold glitter glue to the letters. The back is plain tan felt, but I added the date on it before I made up the ornament. This one stitches out fairly quickly and is a great memento for a dog or cat lover.
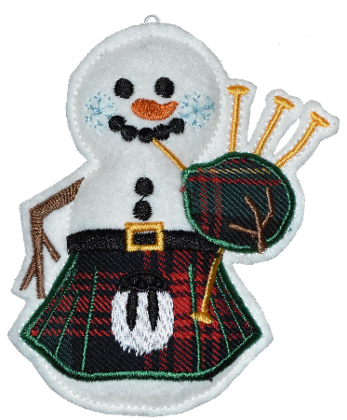
Snowman Piper Felt Ornament
Posted 2019 Apr 12
After completing the kilted Gingerbread Piper ornament shown further down the page, it occurred to me that a Snowman would also work well, so I digitized one of those too. Like his Gingery pal, he's made out of felt appliqued with a small-sett tartan print, with the same sporran and bagpipes theme. And as with Ginger, you can change the look of each Snowman by varying the tartan. Here he is.
If you'd like to add one of these ornaments to your collection, find the design by scrolling down the page at this link.
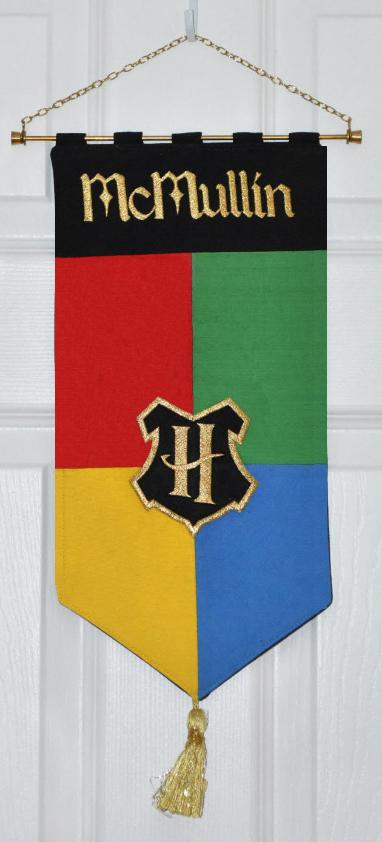
Hogwarts Banner
Posted 2019 Apr 05
One of my sister's friends is crazy about all things Hogwarts, so he'll be plenty pleased when he finds this door banner under the tree next Christmas!
The finished banner is about 8" wide and roughly 18" long. I made the color-blocked body in much the same manner that I used for the Hogwarts stocking below -- stitching the red/green segment and the yellow/blue segments, pressing them flat, and then stitching the two together. I pressed all seams flat and then appliqued crest in the center using gold metallic thread. I used the applique "H" Crest in 3" size (find it on the Magic page here).
I cut a black topper about 4" deep and embroidered the name before sewing it to the top of the color-blocked section. I then trimmed the bottom into a point before finishing it off with loops at top to take the hanger, plus a gold tassel and black backing fabric. Once I had turned it right side out and pressed it flat, I topstitched all around the edge using invisible nylon thread.
The font I used for the name is called Boere Tudor. I originally planned to use the Magic Font that I digitized for the site, but I found that, for this project, I didn't actually like it as well as the Tudor one. See what you think:

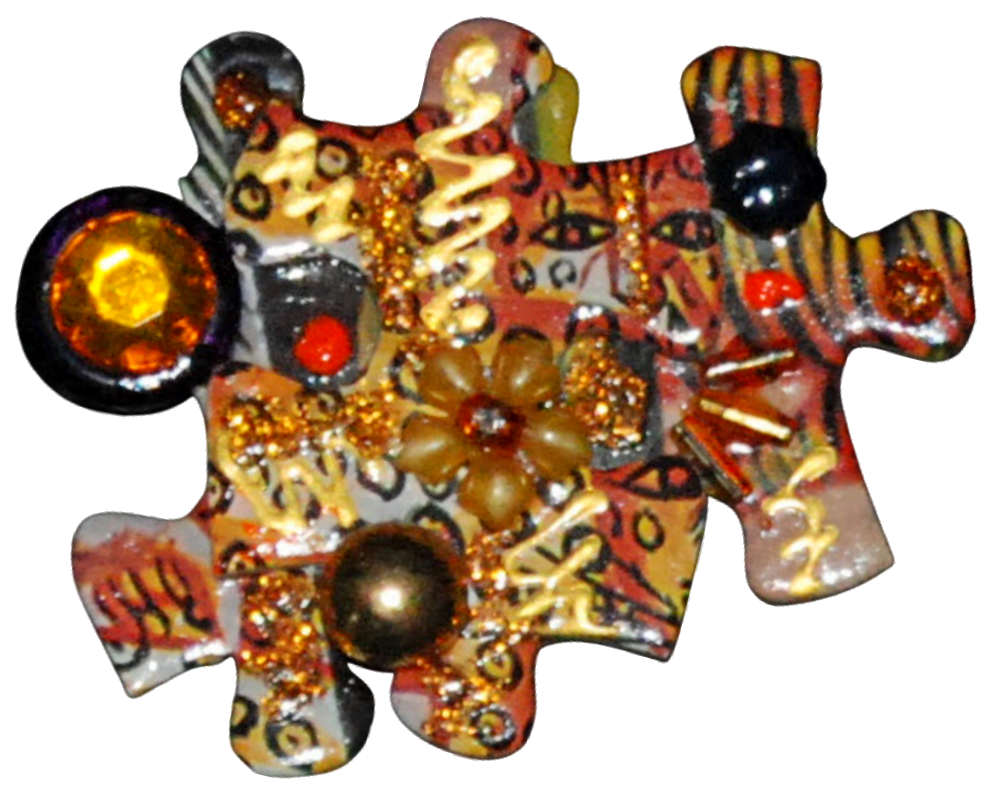
Junque Jewellery Conundrum
Posted 2019 Mar 29
My machine tech is busier than ever now that he's retired, and I'm still waiting for him to arrive and rescue my embroidery machine from its woes, so I'm afraid it's another non-embroidery project for this week.
If you've got a keen eye, you've probably already spotted the raw material underlying this cool brooch: it's made from jigsaw pieces.
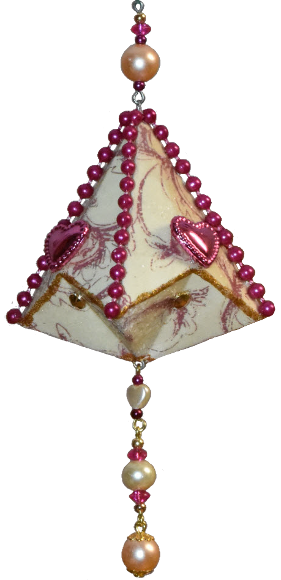
"German Bell" Folded Paper Ornament
Posted 2019 Mar 22
While I was working on a project two days ago, my embroidery machine sprouted a "main motor lock" error that recurs despite my tinkering, so it's time for a visit from the local tech.
While I wait for him to come, I've been playing with some other projects, including this very pretty German bell ornament. These can be made fairly simply with any printed card stock.
Since posting this orignal, I added an expanded post in September 2023, which includes detailed instructions for making these beautiful ornaments.
Gingerbread Piper Felt Ornaments
Posted 2019 Mar 15
After coming across an actual gingerbread cookie decked out in a paper kilt, I decided to create a felt ornament in the same vein. Scottish iconography is a big deal where I come from, and I know my sibs will love these!
If you'd like to make one of these ornaments, find the design by scrolling down the page at this link.

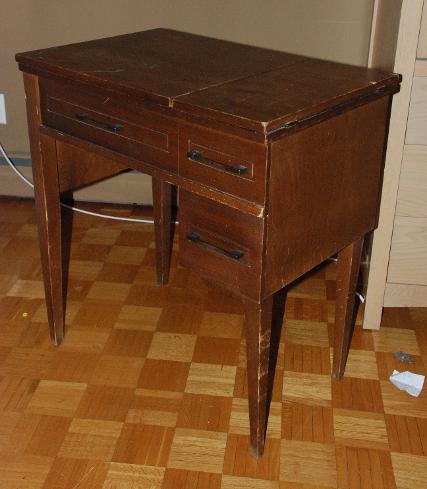
Sewing Machine Cabinet to Light Table Conversion
Posted 2019 Mar 08
Follow me as I repurpose this old sewing machine cabinet into a functional and attractive light table as a gift for a photographer friend.
Vintage Sewing Ornaments
Posted 2019 Mar 01
I embroidered some vintage sewing-themed felt ornaments to hang on the little Christmas tree that stands in the window of my third-floor sewing loft each Christmas.
They're the perfect thing for a fan of classic black Singer sewing machines. Wait til you see 'em!

Spilling Stocking Ornament
Posted 2019 Feb 22
I saw a similar idea on Pinterest and wondered if I could create my own version on the embroidery machine. The design took a little fiddling, but after several adjustments I'm quite pleased with the outcome.
Hogwarts Christmas Stocking
Posted 2019 Feb 13
I don't usually post images of half-finished projects, but I've been working on this stocking for a new baby who won't be arriving til July. At that time, I'll add the name in gold lettering along the black band at the top, and finish out the stocking with a plain back and lining.
The front was constructed of a blocked panel in the four colors of the Hogwarts houses. The stocking is shaped with an understated toe in order to better balance the color blocks.
I assembled the sock by stitching red and green together, then yellow and blue together. After pressing both seams open, I sewed the red-green segment to the yellow-blue segment and pressed the resulting seam open.
I embroidered the "H" crest applique design in the center of the color blocks, using black felt and gold metallic thread, and I'm really pleased with how it looks. (Find the applique crest design here). I then stitched the black band along the top, on which I will eventually embroider the baby's name.
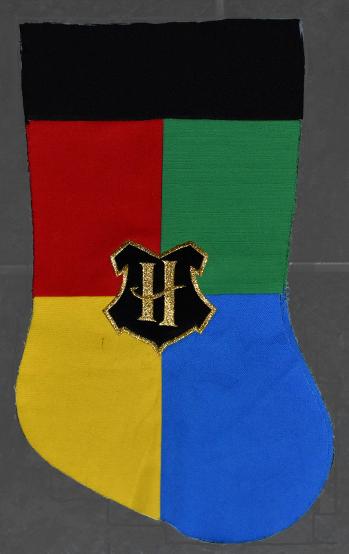
Once I had completed the color-blocked front, I used that as a template to cut the plain back of the stocking from black fabric. Once I'm able to embroider the name, I'll complete the stocking and post updated photos. And then I might just have to make one for my own Christmas decor!
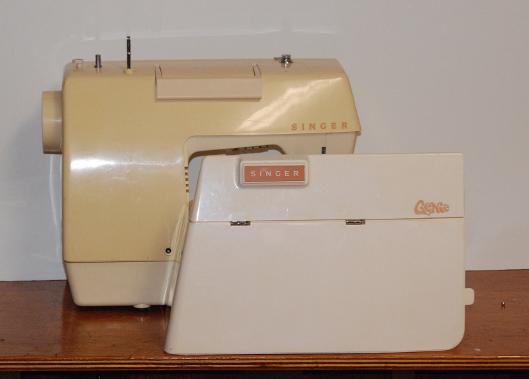
"Retrobritening" Yellowed Plastic
I love to tinker with my collection of vintage sewing machines, which includes a few 70s models with plastic housings and cases. Unfortunately these can turn an ugly dingy yellow over time, especially when exposed to UV light. But there is a simple remedy that will return yellowed plastic to its former brightness, as you can see in the before/after photo at left.
More Embroidered Ornaments
Posted 2019 Feb 1
I recall with fondness those vintage Looney Tunes movie shorts that aired in a cartoon show on lazy Sunday afternoons when I was a kid, and these two-sided embroidered ornaments are a fun bit of nostalgia for Christmas. Click here for PDF instructions on how to make embroidered ornaments from almost any embroidery design. They make great stocking stuffers or ornament-exchange gifts, or add them to your own tree.
Teddy with Embroidable Tummy
Posted 2019 Jan 18
Crystal loves her little green bear with the logo of her favorite football team embroidered on his tummy. He's an easy make even for a novice, and takes about 3 hours from start to finish.
The PDF has more pictures and greater detail.